Here are the Cucumber BDD Interview Questions and Answers, based on my understanding. If you want my complete set of Cucumber BDD Questions and Answers as a document, you can message me on LinkedIn at Inder P Singh.

Question: What is Cucumber BDD?
Answer: Cucumber is an open‑source tool that supports Behavior‑Driven Development, commonly called BDD. It allows teams to write test cases in plain English using a syntax called Gherkin. These tests, known as "scenarios" in Cucumber are easy to understand for both technical and non‑technical stakeholders. The goal of Cucumber is to help the communication between developers, testers, and business analysts by writing tests according to the business requirements. View an introduction to Cucumber.
Example: a basic Cucumber scenario may look like this:
- Early Testing: Cucumber works with Agile methodologies, where testing is done early and iteratively. Since the test scenarios are defined before development begins, it helps to build features according to the business requirements from the start.
- Living Documentation: Cucumber scenarios are also documentation. These readable test cases describe how the application should behave. They should be constantly updated with each sprint, so that they’re up‑to‑date with the system's functionality.
- Automation Support: Cucumber integrates with automation tools and frameworks like Selenium, allowing to automate acceptance tests. As the scenarios are in plain language, testers can link them to code, enabling continuous testing.
BDD stands for Behavior‑Driven Development. View What is BDD short video. BDD is an evolution of Test‑Driven Development (TDD) where tests are written in the form of expected behaviors of the application. Instead of focusing on technical tests, BDD focuses on the user’s perspective. Cucumber helps in implementing BDD because it provides a framework to write these behaviors as tests. The importance of BDD in Cucumber is its focus on collaboration, and guiding the features being developed to be according to the business needs. Cucumber’s structure encourages teams to think in terms of "what" the system should do, rather than "how" it should be built.
View Cucumber Interview Questions and Answers video in my Software and Testing Training channel or read on.
Answer: Cucumber is an open‑source tool that supports Behavior‑Driven Development, commonly called BDD. It allows teams to write test cases in plain English using a syntax called Gherkin. These tests, known as "scenarios" in Cucumber are easy to understand for both technical and non‑technical stakeholders. The goal of Cucumber is to help the communication between developers, testers, and business analysts by writing tests according to the business requirements. View an introduction to Cucumber.
Example: a basic Cucumber scenario may look like this:
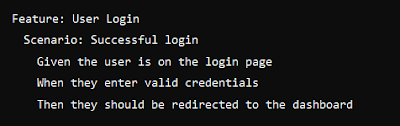
Feature: User login
  Scenario: Successful login
    Given the user is on the login page
    When the user enters valid credentials
    Then the user is redirected to the dashboard
- Improved Collaboration: Cucumber improves collaboration across teams by using a common language syntax (Gherkin) to describe tests. This allows business stakeholders, developers, and testers to all contribute to test scenarios, reducing misunderstanding.- Early Testing: Cucumber works with Agile methodologies, where testing is done early and iteratively. Since the test scenarios are defined before development begins, it helps to build features according to the business requirements from the start.
- Living Documentation: Cucumber scenarios are also documentation. These readable test cases describe how the application should behave. They should be constantly updated with each sprint, so that they’re up‑to‑date with the system's functionality.
- Automation Support: Cucumber integrates with automation tools and frameworks like Selenium, allowing to automate acceptance tests. As the scenarios are in plain language, testers can link them to code, enabling continuous testing.
BDD stands for Behavior‑Driven Development. View What is BDD short video. BDD is an evolution of Test‑Driven Development (TDD) where tests are written in the form of expected behaviors of the application. Instead of focusing on technical tests, BDD focuses on the user’s perspective. Cucumber helps in implementing BDD because it provides a framework to write these behaviors as tests. The importance of BDD in Cucumber is its focus on collaboration, and guiding the features being developed to be according to the business needs. Cucumber’s structure encourages teams to think in terms of "what" the system should do, rather than "how" it should be built.
View Cucumber Interview Questions and Answers video in my Software and Testing Training channel or read on.
Question: What are feature files, step definitions, and Gherkin syntax in Cucumber?
Answer: In Cucumber, these are the elements of how the tests are structured:
- Feature Files: Plain text files written using Gherkin syntax, where scenarios are described. Each feature file represents a specific functionality of the application, such as "User Login" or "Shopping Cart."
Example: A feature file might be as follows:
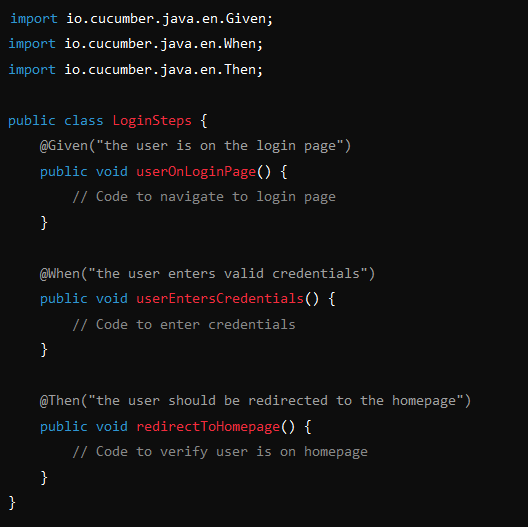
- Step Definitions: The code implementations of the steps defined in the Gherkin scenarios. Each Gherkin step (Given, When, Then) is linked to a corresponding code block in the step definition file.
Example: A Java step definition could look like:
 - Gherkin Syntax: The language used to write feature files. It uses simple constructs like Given, When, Then, And, and But to describe system behavior in scenarios.
Answer: In Cucumber, these are the elements of how the tests are structured:
- Feature Files: Plain text files written using Gherkin syntax, where scenarios are described. Each feature file represents a specific functionality of the application, such as "User Login" or "Shopping Cart."
Example: A feature file might be as follows:

- Step Definitions: The code implementations of the steps defined in the Gherkin scenarios. Each Gherkin step (Given, When, Then) is linked to a corresponding code block in the step definition file.
Example: A Java step definition could look like:

Question: What are the best practices for writing scenarios using Gherkin language?
Answer: Writing clear and maintainable Gherkin scenarios is essential for successful Cucumber BDD. Some best practices include:
- Keep it Simple: Write steps in clear, concise language that non‑technical stakeholders can understand. Instead of “When the user clicks the button with id 'submitBtn'”, use “When the user submits the login form”.
- Single Behavior per Scenario: Each scenario should test only one specific behavior to keep maintenance easy.
- Avoid Technical Details: Scenarios should describe what the system does, not how it’s implemented.
- Use Background if needed: For repetitive setup steps (e.g., logging in), use a Background block. For example: - Readable Scenario Names: Give scenarios meaningful titles so their purpose is obvious at a glance.
Answer: Writing clear and maintainable Gherkin scenarios is essential for successful Cucumber BDD. Some best practices include:
- Keep it Simple: Write steps in clear, concise language that non‑technical stakeholders can understand. Instead of “When the user clicks the button with id 'submitBtn'”, use “When the user submits the login form”.
- Single Behavior per Scenario: Each scenario should test only one specific behavior to keep maintenance easy.
- Avoid Technical Details: Scenarios should describe what the system does, not how it’s implemented.
- Use Background if needed: For repetitive setup steps (e.g., logging in), use a Background block. For example:

Question: What are Cucumber tags and how are they used in test organization?
Answer: Cucumber tags are used to organize and selectively run scenarios or entire feature files. Tags allow you to group scenarios based on their functionality, priority, or other criteria. Tags are added to the scenario or feature level using @ followed by a name. You can then specify which tags to run when executing tests. On a side note, you should subscribe to Software and Testing Training YouTube channel, if you’re interested in learning test automation effectively and quickly. The example of using tags is: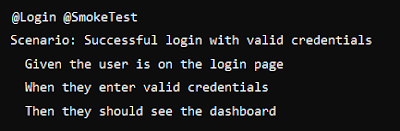 You can run tests based on tags, such as only running @SmokeTest scenarios. For example, by using the command:
Answer: Cucumber tags are used to organize and selectively run scenarios or entire feature files. Tags allow you to group scenarios based on their functionality, priority, or other criteria. Tags are added to the scenario or feature level using @ followed by a name. You can then specify which tags to run when executing tests. On a side note, you should subscribe to Software and Testing Training YouTube channel, if you’re interested in learning test automation effectively and quickly. The example of using tags is:

mvn test -Dcucumber.options="--tags @SmokeTest"
Question: What are the benefits of using Cucumber tags for test organization?
Answer: Cucumber tags provide:
- Selective Test Execution: Run suites by functionality or priority (e.g., smoke, regression).
- Parallel Execution: Enable parallel runs to reduce overall test time.
- Categorization: Make it easier to manage tests by feature, sprint, or other logical groups.
Answer: Cucumber tags provide:
- Selective Test Execution: Run suites by functionality or priority (e.g., smoke, regression).
- Parallel Execution: Enable parallel runs to reduce overall test time.
- Categorization: Make it easier to manage tests by feature, sprint, or other logical groups.
Question: How can you integrate Cucumber with Java and build tools like Maven?
Answer: Integrating Cucumber with Java using Maven in test automation has the following steps:
Answer: Integrating Cucumber with Java using Maven in test automation has the following steps:
- Create a Maven Project: In your IDE (such as IntelliJ or Eclipse), create a new Maven project. This provides a standard way to manage dependencies.
- Add Cucumber Dependencies in pom.xml: To use Cucumber, you need to add the required dependencies to your pom.xml file. This typically includes cucumber-java, cucumber-junit, and cucumber-testng (depending on your setup).
Example:pom.xml dependencies:
- Set Up Your Feature Files and Step Definitions: Create a folder for your feature files and write your test scenarios using Gherkin syntax. Then, create step definition files that link the Gherkin steps to actual Java code.
Example:pom.xml dependencies:

- Set Up Your Feature Files and Step Definitions: Create a folder for your feature files and write your test scenarios using Gherkin syntax. Then, create step definition files that link the Gherkin steps to actual Java code.
- Run Tests with Maven: To execute the Cucumber tests, you can use Maven commands. The command that will run the tests is mvn test
If you’re interested in test automation and software testing documents, ensure that you follow me on LinkedIn at https://www.linkedin.com/in/inderpsingh/
Question: What’s an organized folder structure for a Cucumber project?
Answer: A structured folder layout helps to maintain a Cucumber BDD project. Here's a suggested folder structure: - features: Contains all your Gherkin feature files. Each feature is a part of the application’s functionality.
Answer: A structured folder layout helps to maintain a Cucumber BDD project. Here's a suggested folder structure:

- stepDefinitions: Java code that implements the Gherkin steps.
- hooks: Optional folder where you can add setup and teardown methods (before and after each scenario) using @Before and @After annotations.
Question: What configuration files are needed to run Cucumber tests?
Answer: The following are the important configuration files for running Cucumber tests:
Answer: The following are the important configuration files for running Cucumber tests:
- pom.xml (for Maven projects): As I explained above, pom.xml manages all the dependencies required for Cucumber, JUnit, or TestNG. It defines the project and test settings for Maven to execute.
- cucumber.properties: This is an optional configuration file for setting environment variables for Cucumber. It can be used to define data like:
- Default tag expressions
- Format of the output report
- Glue paths for step definitions
- JUnit/TestNG Runner Class: This file triggers the Cucumber test suite. A runner class is written to specify how to execute the Cucumber tests. If you aren’t familiar with JUnit framework, you can view the Software and Testing Training JUnit tutorials at https://youtu.be/e8Q44fWAXYU and https://youtu.be/mZ1Sy5JuFwI
Example: of a JUnit Runner class: This class gives Cucumber data on where the feature files are located and how to run them.
Example: of a JUnit Runner class: This class gives Cucumber data on where the feature files are located and how to run them.

- Log4j or Logback Config File (Optional): If you want detailed logs for debugging purposes, you can include log configuration files like log4j.properties or logback.xml.
Question: How can you integrate Cucumber with TestNG for test execution?
Answer: Integrating Cucumber with TestNG for test execution is commonly used in Java-based automation frameworks. The steps to do it are:
Answer: Integrating Cucumber with TestNG for test execution is commonly used in Java-based automation frameworks. The steps to do it are:
- Add Cucumber and TestNG Dependencies: In your Maven project, add the required dependencies for both Cucumber and TestNG to your pom.xml file. The following is an example of pom.xml dependencies:

- Create the Runner Class: Unlike JUnit, TestNG uses a TestNGCucumberRunner class to execute Cucumber tests. A runner class looks something like below. This class acts as a bridge to run Cucumber scenarios with the TestNG testing framework. 

- Configure testng.xml: The testng.xml file defines how the tests are executed. It specifies which classes (e.g. your runner class) TestNG will execute. The example testng.xml file is: 

- Run the Tests: Once your runner class and testng.xml are configured, you can run your tests using TestNG either through your IDE or from the command such as:
mvn test -Dsurefire.suiteXmlFiles=testng.xml
Question: What is the role of the testng.xml file and the runner class in Cucumber with TestNG?
Answer: The testng.xml file and the runner class have roles in executing Cucumber tests within the TestNG framework. - testng.xml file: This configuration file tells TestNG how to organize and execute tests. It specifies which classes to run, allows for grouping, and supports parallel execution of tests. You can also define test suites and control the order of execution, which is useful for managing large test sets. - Runner Class: The runner class launches the Cucumber tests. For TestNG, the runner class extends AbstractTestNGCucumberTests, which integrates Cucumber with TestNG. In this class, you define the location of the feature files, step definitions, and any other Cucumber options like reporting plugins.
Answer: The testng.xml file and the runner class have roles in executing Cucumber tests within the TestNG framework. - testng.xml file: This configuration file tells TestNG how to organize and execute tests. It specifies which classes to run, allows for grouping, and supports parallel execution of tests. You can also define test suites and control the order of execution, which is useful for managing large test sets. - Runner Class: The runner class launches the Cucumber tests. For TestNG, the runner class extends AbstractTestNGCucumberTests, which integrates Cucumber with TestNG. In this class, you define the location of the feature files, step definitions, and any other Cucumber options like reporting plugins.
Question: How do you run Cucumber tests in parallel using TestNG?
Answer: Running Cucumber tests in parallel using TestNG can reduce total execution time, especially when there are many scenarios to test. The steps to set it up are below. If you need code snippets, you can connect to me at https://www.linkedin.com/in/inderpsingh/ - Enable Parallel Execution in testng.xml: TestNG allows you to run tests in parallel by adding a parallel attribute in the suite tag of your testng.xml file. The example configuration for parallel execution is: - Run Scenarios in Parallel: To run individual Cucumber scenarios in parallel, you need to configure your runner class to enable parallel execution. This can be done by overriding the scenarios() method in the runner class. The example of enabling parallel execution in the runner class is below. In this setup, each Cucumber scenario will run in parallel, using the parallel = true attribute in the @DataProvider annotation. - Run the Tests: You can then execute the tests using Maven (see example below) or from your IDE. TestNG will run the tests in parallel across multiple threads as defined.
Answer: Running Cucumber tests in parallel using TestNG can reduce total execution time, especially when there are many scenarios to test. The steps to set it up are below. If you need code snippets, you can connect to me at https://www.linkedin.com/in/inderpsingh/ - Enable Parallel Execution in testng.xml: TestNG allows you to run tests in parallel by adding a parallel attribute in the suite tag of your testng.xml file. The example configuration for parallel execution is: - Run Scenarios in Parallel: To run individual Cucumber scenarios in parallel, you need to configure your runner class to enable parallel execution. This can be done by overriding the scenarios() method in the runner class. The example of enabling parallel execution in the runner class is below. In this setup, each Cucumber scenario will run in parallel, using the parallel = true attribute in the @DataProvider annotation. - Run the Tests: You can then execute the tests using Maven (see example below) or from your IDE. TestNG will run the tests in parallel across multiple threads as defined.
mvn test -Dsurefire.suiteXmlFiles=testng.xml
Question: How do you set up Cucumber with JUnit for running BDD tests?
Answer: Setting up Cucumber with JUnit for running BDD tests is common in Java-based automation frameworks. The steps to get it working:
Answer: Setting up Cucumber with JUnit for running BDD tests is common in Java-based automation frameworks. The steps to get it working:
- Add Dependencies: In your Maven project's pom.xml file, add the Cucumber and JUnit dependencies (shown above).
- Create a JUnit Runner Class: JUnit uses the @RunWith annotation (shown above) to execute Cucumber tests. The runner class defines where your feature files and step definitions are located.
- Write Feature Files: Cucumber feature files (with .feature file extension) contain your BDD scenarios written in Gherkin syntax. For example: 

- Create Step Definitions: The step definitions implement the logic for each step in the feature file. The example step definition for the scenario is: 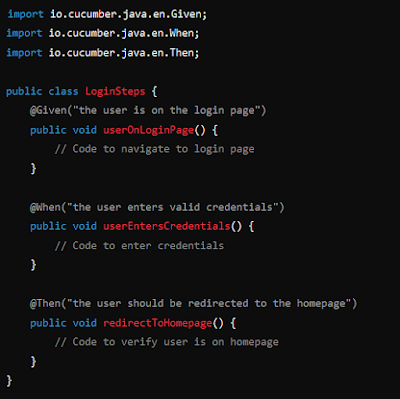
- Run the Tests: You can run the JUnit runner class either from your IDE or via Maven using the command like mvn test
You can see more examples in my Cucumber Interview Questions and Answers video.
Question: What are the differences between TestNG and JUnit for running Cucumber tests?
Answer: TestNG and JUnit frameworks used to execute Cucumber tests have some differences in terms of features and flexibility:
Answer: TestNG and JUnit frameworks used to execute Cucumber tests have some differences in terms of features and flexibility:
| Difference | JUnit | TestNG |
|---|---|---|
| Annotations | Uses simple annotations like @Before, @After, and @Test. | Has more advanced annotations like @BeforeClass, @AfterClass, @BeforeSuite, and @AfterSuite, which allow for more levels of control over test execution. |
| Test Configuration | No built-in configuration file; all configuration is done in code, typically in the runner class or via custom setups. | Uses testng.xml for advanced configuration, which can be used to define test suites, groups, and enable parallel execution. |
| Parallel Execution | Running tests in parallel requires extra setup or third-party plugins like Maven Surefire. JUnit 4 doesn’t have built-in support for parallel execution. | Has built-in support for parallel execution with a simple configuration in the testng.xml file. |
| Flexibility | Lightweight and suitable for simple test cases but lacks the advanced features of TestNG. | More powerful in terms of grouping tests, running them in parallel, and generating advanced reports. |
| Dependency Injection | Supports dependency injection with frameworks like Spring, but configuration can be more complex. | Built-in dependency injection, making it more flexible for test setups requiring external dependencies. |
Question: How can you integrate Rest Assured with Cucumber for API testing?
Answer: To integrate Rest Assured with Cucumber for API testing, follow these steps:
Answer: To integrate Rest Assured with Cucumber for API testing, follow these steps:
- Add Dependencies: Add Cucumber and Rest Assured dependencies to your pom.xml if you’re using Maven. 

- Create Feature File: Create a Cucumber feature file for your API test cases using Gherkin syntax. This describes the behavior of the API.
Example:
- Write Step Definitions: The step definitions use Rest Assured to handle API requests and responses. You should implement the logic here for the steps defined in the feature file.
Example:
- Run the Tests: Finally, you run the tests via your Cucumber runner class or with Maven. The Cucumber runner class executes the feature file and maps the steps to the Rest Assured API interactions.
Example:
Example:

- Write Step Definitions: The step definitions use Rest Assured to handle API requests and responses. You should implement the logic here for the steps defined in the feature file.
Example:

- Run the Tests: Finally, you run the tests via your Cucumber runner class or with Maven. The Cucumber runner class executes the feature file and maps the steps to the Rest Assured API interactions.
Example:

Question: How can you write API scenarios using Gherkin in Cucumber?
Answer: Writing API scenarios in Gherkin for Cucumber makes them human-readable. Here’s how you can write API scenarios:
Answer: Writing API scenarios in Gherkin for Cucumber makes them human-readable. Here’s how you can write API scenarios:
- Define the Feature: The first line of the feature file starts with Feature: and provides a high-level description of what you’re testing. For API testing, it could be about validating the functionality of a particular endpoint.
Example:
Example:
Feature: API testing for User details endpoint - Define the Scenario: Each scenario describes a specific test case. It begins with the Scenario: keyword followed by a descriptive title. For API testing, this might include checking the status code, headers, or response body.
Example:
Example:
Example:
Scenario: Verify API response for user details
- Write Gherkin Steps: Use Given, When, and Then steps to define the conditions, actions, and expected outcomes of the API call.
- Given sets up the initial context, such as the API endpoint.
- When describes the action, such as sending a request.
- Then checks the expected result, such as the status code or response content.
Example:
Given I set the API endpoint to "/users/1"
When I send a GET request
Then the response status should be 200
And the JSON response field "name" should equal "John Doe"
Question: How can you manage JSON responses and API requests in Cucumber BDD?
Answer: Managing JSON responses and API requests in Cucumber BDD is done using the step definitions where you interact with the APIs using Rest Assured. Here’s how you can handle API requests and JSON responses:
Answer: Managing JSON responses and API requests in Cucumber BDD is done using the step definitions where you interact with the APIs using Rest Assured. Here’s how you can handle API requests and JSON responses:
- Sending API Requests: You can use Rest Assured to send various types of HTTP requests (GET, POST, PUT, DELETE). For example, you can send a GET request as

Response response = given().when().get(apiEndpoint);For a POST request with a JSON payload:

- Extracting Data from JSON Responses: Rest Assured has the feature to parse JSON responses. You can extract values from the response body using methods like jsonPath().
Example:
String userName = response.jsonPath().getString("name");
- Assertions on JSON Responses: Once you’ve extracted the necessary data from the JSON response, you can assert that it matches the expected result.
Example:
Assert.assertEquals("John Doe", userName);
- Handling Complex JSON: If the API returns a complex JSON response with nested objects, you can use jsonPath to navigate the structure.
Example:
String city = response.jsonPath().getString("address.city");
Question: How can you implement data-driven testing in Cucumber using Scenario Outline and Examples?
Answer: Data-driven testing in Cucumber is achieved using the Scenario Outline and Examples keywords. Scenario Outline allows you to write a single scenario and run it multiple times with different sets of test data. The Examples keyword is used to define the data. In the example below, the same steps are executed for each row of data in the Examples table. Cucumber will replace the placeholders (username, password, message) with the corresponding values from each row during execution.
Answer: Data-driven testing in Cucumber is achieved using the Scenario Outline and Examples keywords. Scenario Outline allows you to write a single scenario and run it multiple times with different sets of test data. The Examples keyword is used to define the data. In the example below, the same steps are executed for each row of data in the Examples table. Cucumber will replace the placeholders (username, password, message) with the corresponding values from each row during execution.

Question: What are Hooks in Cucumber and how are they used?
Answer: Hooks in Cucumber allow you to run blocks of code before or after each scenario. They set up preconditions and clean up after test execution. These hooks are useful where you need to initialize resources like databases or browsers before the tests run and release resources or reset states afterward. There are two main types of hooks:
- @Before: This hook runs before each scenario.
- @After: This hook runs after each scenario.
Example:

Question: What is Cucumber Glue and how does it link step definitions to scenarios?
Answer: In Cucumber, the term glue refers to the code that connects the Gherkin steps in feature files to their corresponding step definitions in Java (or any other language that Cucumber supports). The glue option in the Cucumber runner class defines the package where the step definition files are located. For example, if your step definitions are in the stepDefinitions package, you would specify the glue path in the runner class like below. The glue links the feature steps to the step definition methods that contain the logic for each step. Without the correct glue path, Cucumber will not know where to find the step definitions, and the tests will fail to execute properly.
Answer: In Cucumber, the term glue refers to the code that connects the Gherkin steps in feature files to their corresponding step definitions in Java (or any other language that Cucumber supports). The glue option in the Cucumber runner class defines the package where the step definition files are located. For example, if your step definitions are in the stepDefinitions package, you would specify the glue path in the runner class like below. The glue links the feature steps to the step definition methods that contain the logic for each step. Without the correct glue path, Cucumber will not know where to find the step definitions, and the tests will fail to execute properly.

No comments:
Post a Comment
Note: Only a member of this blog may post a comment.